Teaching in the future with Microsoft Interactive Classroom

Sometimes you discover a great learning tool, hidden somewhere on the web. The Microsoft Interactive Classroom is such a tool, and it gives us a taste of what classroom training might be in the (near) future. If you have ever wondered if they was way you could avoid printing tons of paper manuals, if you are tired of distributing PowerPoint handouts that nobody ever uses, this is for you.

Basically, it is an add-on to PowerPoint and OneNote (2007 or 2010). As a teacher, you use PowerPoint to prepare your slides as usual, and you can use the Microsoft Interactive Classroom add-on to add question slides in your presentation. You get an extra tab in the ribbon for that:

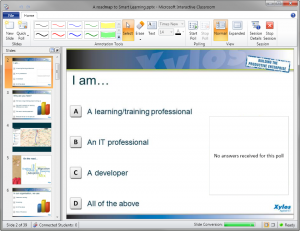
Once you start giving your session, you click the Start Session button. This starts a broadcast of your presentation on the network. Your screen will look like this:

With the ribbon, you can annotate your slides (works great if you have a tablet!) but also start polls, display the results of the poll to your students…

But the best feature is yet to come. Your students connect to your broadcasted session with… OneNote! They automatically get a copy of the slides as a separate note page, they can take their own notes on the slides, they see the annotations of the instructor in their OneNote… and after the session they go home with their own annotated lesson material. Of course, they need to be connected to the same network (wired or wireless).

We tried it during an interactive session of one hour with 20 workstations and it was quite impressive. And what is even better: it’s free!

Update: this tool is now officially part of Microsoft OneNote and called OneNote Class Notebookhttps://www.onenote.com/classnotebook
Microsoft LCDS version 2.5

Microsoft released a new version of its Learning Content Development System, the free content authoring tool. The release notes show the following changes:
  • E-learning created is compatible with Firefox 3.5.9 and Firefox 3.6.3.
  • Microsoft Silverlight 4 Media Player for animations that include closed captioning.
  • Enhanced keyboard accessibility for the sort and tile games, adventure interactivity, and Voice of the Expert element.
  • LCDS authoring and e-learning created are completely compatible with Microsoft Silverlight 4.0.
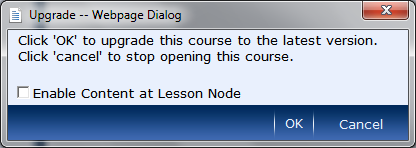
An interesting new feature is the possibility to create content on the “lesson” level. Previous versions did not allow this, which sometimes resulted in blank pages in the course structure when you imported the SCORM package in an LMS. When you open a course in the new version, you will notice an option to enable the content at the lesson level:
Tip: if you don’t know which version of LCDS you are running, open LCDS and press Shift+F1.

Moodle: Flash animations suddenly don’t appear

We experienced a serious issue in one of our Moodle platforms. Flash animations that worked before, suddenly did not appear anymore. Instead, a warning message appears stating that the Flash player used is too old.
This issue was caused by a recent upgrade to the platform. For security reasons, a new parameter was added, that forces the Moodle users to upgrade to a specific version of the Flash player.
The default in my Moodle version (1.9.7) was set to version 10.0.12, which is pretty recent. In corporate networks, users often do not have the rights to upgrade the player, so this might cause some problems.
You can set the value to an earlier version, or leave the option blank to disable the checking. The option is called Required Flash Player Version and can be found in Site Administration – Security – HTTP Security.

Create a SCORM package from a Microsoft LCDS course

I was looking at the stats of my blog, and some of the most visited articles are the ones about Microsoft LCDS. A lot of people are contacting me because they have trouble publishing the LCDS content to a learning management system (e.g. to the SharePoint Learning Kit). Tom Molskov already posted a very useful comment with a procedure on how to do this, but I thought it was time for a little screencast.

This is how I do it:

  1. Open your course in LCDS
  2. Click the Media button in the toolbar to open the Media folder
  3. In the Media window, go one level UP. This brings you in the Courses folder
  4. Select all files (Ctrl+A) and add them to  a compressed folder (.zip)
  5. Upload that zip file to your Learning Management System